Experiencing sound issues on your laptop can be incredibly frustrating, especially when you’re in the midst of watching a movie or joining an online meeting. Sound plays a vital role in both work and leisure activities, making it crucial to ensure your laptop’s audio system functions properly. Lack of sound or distorted audio are common problems that can have simple fixes.
Getting to the bottom of sound issues often involves checking a few key areas. Sometimes the problem lies in the hardware, while other times it’s about the configurations or driver settings. Understanding where to look can help you fix these problems quickly.
By learning how to troubleshoot and resolve audio issues, you can save time and potentially avoid the costs of unnecessary repairs. Whether it’s ensuring your drivers are up to date or verifying connections with external devices, there are several straightforward steps to get your laptop’s sound back to normal. Dive in to explore these solutions and enjoy crystal-clear audio on your laptop once again.
Identify and Troubleshoot Sound Hardware Issues
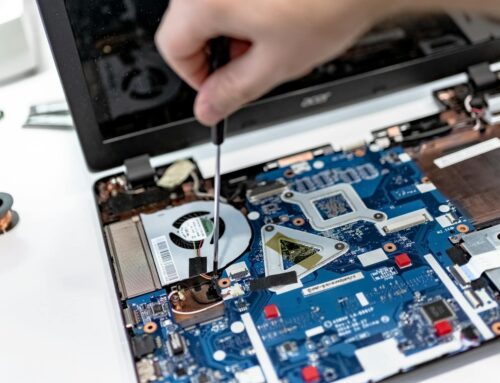
Before diving into software solutions, ensure that the sound hardware components are working correctly. Start with inspecting the laptop’s speakers and headphone jack. Sometimes dirt or dust can accumulate, causing poor sound quality or no sound at all. Gently clean these areas with a dry, soft cloth or a small brush.
Next, test the speakers. Play an audio track you’re familiar with and check for sound output. If there’s no sound, try plugging in headphones to see if they work. If you only get sound through the headphones, the issue might be with the internal speakers.
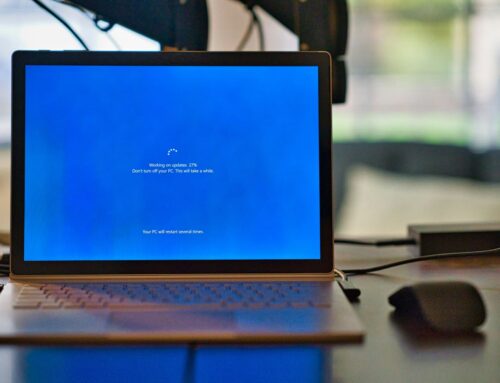
For laptops with removable batteries, performing a power reset can help. Shut down the laptop, remove the battery, and hold the power button for 30 seconds. Reinstall the battery and turn the laptop back on. This can sometimes resolve hardware-related glitches.
Keep an eye out for any physical damage to speaker grills or headphone ports. A damaged port can cause connection issues. If possible, connect your laptop to external speakers and check if the audio works. This can help determine if the issue is with the laptop’s built-in speakers.
By systematically checking these areas, you can identify whether a hardware issue is behind the sound problems on your laptop.
Update and Configure Audio Drivers
Drivers play a crucial role in the functioning of your laptop’s sound system. Outdated or corrupted audio drivers can lead to various sound issues, which can be solved by updating them. Start by checking your device manager on your laptop.
1. Open Device Manager: Access it through the Control Panel or by typing “Device Manager” in the search bar.
2. Locate Sound Drivers: Look for “Sound, video, and game controllers” and click to expand the list.
3. Update Drivers: Right-click on your audio device, choose “Update driver,” and select “Search automatically for updated driver software.” Allow the system to search for updates and install them if available.
Sometimes, it’s necessary to uninstall the sound driver and reinstall it. Right-click the audio driver and choose “Uninstall device.” Restart your laptop, and the system will attempt to reinstall the drivers automatically.
Resetting the default sound settings can also help fix audio issues. Access the “Sound” settings from the Control Panel, select your audio output device, and choose “Set Default.” Additionally, check the enhancements tab and make sure no unnecessary sound effects are applied, as these can interfere with normal audio output.
Keeping your audio drivers updated and correctly configured ensures your laptop’s sound system works seamlessly, preventing disruptions in your audio enjoyment.
Check Sound Settings and Configurations
Verifying your sound settings is key to solving audio problems on your laptop. Start by checking the volume levels. It might sound obvious, but sometimes the system volume is muted or set too low. Look for the speaker icon in the system tray and make sure it’s at a suitable level.
Dive into the sound settings by right-clicking the speaker icon and selecting “Open Sound settings.” Ensure your laptop’s default playback device is set correctly, especially if you use different audio devices like headphones or speakers. Go to the “Playback” tab and confirm which device is set as the default.
Explore the “Advanced” settings under the playback device properties. Here, you’ll find different audio formats. Test these settings by choosing different formats and clicking “Test.” Listen for the audio to determine if changing the format resolves the issue.
If the sound still isn’t clear, you might need to adjust the balance or spatial sound configurations. Look for sound enhancements or spatial sound tabs within the settings and experiment with these options. Resetting all settings to default can also resolve conflicts that affect sound output.
Making sure your sound settings are correct can fix many common audio issues without needing advanced technical skills.
External Device Connections and Testing
When dealing with sound problems, external devices might be the culprits. It’s important to thoroughly check any headphones, speakers, or Bluetooth devices you connect to your laptop. These connections can cause sound disruptions when not working properly.
First, inspect any connected devices for physical damage. Check headphone cables and speaker wires for frays or kinks. With wireless devices, ensure the batteries are charged and pairing is successful. Test the sound output by switching to another device to determine if the problem persists across different hardware.
If you use Bluetooth headphones or speakers, confirm that the Bluetooth settings on your laptop recognise and connect to the external device without issues. Sometimes, unpairing and repairing the device can solve connection problems.
For wired connections, make sure the jacks are fully inserted and fit snugly into the ports. Try the external devices on a different laptop or phone to ensure they’re not faulty.
Understanding how to troubleshoot external audio devices helps maintain steady sound output. This approach saves time and prevents the frustration of poor sound quality during important tasks.
Conclusion
Keeping your laptop’s sound system in peak condition involves a combination of hardware checks, driver updates, and correct settings configurations. Each step is critical in diagnosing and fixing audio issues effectively. By checking the hardware, updating drivers, exploring sound settings, and ensuring proper external connections, you can manage and resolve most sound problems on your own.
Staying proactive and regularly maintaining your laptop’s audio components will enhance your overall user experience, whether it’s for enjoying music, watching videos, or partaking in virtual meetings. Remember, simple adjustments can often solve what might seem like complex problems.
If you need computer repairs in London, Forest City Computer Repairs is ready to help. Our skilled team can diagnose and repair your laptop swiftly, ensuring you get back to what you love most with seamless audio. Reach out to us for expert assistance and rediscover the joy of perfect sound quality on your devices.